Hello! My name is Miranda Sebastian and I have been working with SOAR for the past two years as a course director and GAP year mentor. Before starting my outdoor education journey, I got a degree in photographic technologies and managed my own freelance photography business. When I’m not working I love spending time with my pug Winston and being outside.

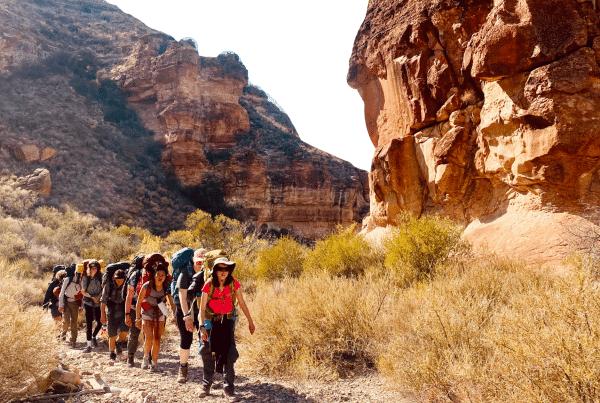
On average, I spend about six months of every year out in the field with students or campers. As an instructor, it’s a blast. Each day brings something new and it’s a joy to foster a love for Mother Earth. As a photographer, it’s a dream. I get to witness people experiencing nature (sometimes for the first time.) I get to capture the abundance of emotion that comes with a backcountry experience. The joys, trials, perseverance, and splendor. All in some of the most picturesque locations in our country. Photographing others in the field can be a challenge, but it’s a great way to capture memories and experiences that might otherwise be forgotten. Here are a few tips that can help you get the best shots the next time you’re in the great outdoors.
1. Find your angle:
Everyone sees the world from their own perspective. But photography gives us the opportunity to entertain a new perspective. Play around with different heights. Try squatting down or finding something to stand on. Experimenting with different angles can lead to unique and creative shots. One example is photographing a body of water. A shot taken from the waterline can help you fill your frame with the most interesting part of the scene, while also providing a unique angle that most people wouldn’t see when simply standing and looking at the water. Taking the time to explore different angles can elevate your photography and add visual interest to your work.

2. Know your equipment:
You never eat a delicious meal, and say “Wow, that chef must have a really great oven.” The same is true for photography. You don’t need a several thousand dollar investment hanging around your neck to get the shot you want. You just have to know how to use what you’ve got. For most people, the best camera for the backcountry will be your phone. Familiarize yourself with the settings (long exposure, portrait modes, and various internal lenses) so that you have the most control possible over your final image. 95% of what I shoot is taken with my iPhone. And my back is better off with 5+ fewer pounds in my pack than would be there if I took my DSLR setup. Different phones and cameras have unique features and capabilities that can only be utilized when the user understands how to operate them. Additionally, being familiar with your equipment can help you work more efficiently and creatively. Overall, investing time in learning how to use your camera can significantly enhance your skills and improve the quality of your work.

3. Time of day: It matters, but we can also adapt!
We’ve all heard of the golden hour. It’s named that for a reason. When the sun is lower in the sky (sunrise and sunset) the light is softer and will give you more pleasing results. This is true with nature photography and portraits. Nothing is more disheartening than standing in front of a world-class view and everyone is squinting because the sun is in their eyes. However, sometimes we don’t have control over when we get to a certain location. So if you find yourself on top of the mountain at noon, do your best to create shade. Find a tree to put people under. Notice the shadows on their face and angle them in the most pleasing way.

4. Take multiple focal lengths:
Most smartphones today come with a variety of lenses, so let’s use them! The optical zoom from using a different lens is far superior to simply “zooming in.” (Digital zoom). When I’m photographing my students or campers, I will usually try to get a photo of them, where the background comes second to the expression on their faces. But I also will switch to a wider lens and take the same photo showing the location of where they are. After all, they worked hard to get there. And if you don’t have multiple lenses to work with, no problem! Simply get closer to your subject and move further away. This will achieve the same effect with minimal equipment needed.

5. Use the rule of thirds:
The rule of thirds is a basic principle of composition that can help you create more interesting and dynamic photos. Analyze what’s in your frame. It’s the canvas on which you’re telling your story. Ask yourself, “ What would be more interesting? 2/3rds of my frame showing the ground, or more of my frame dedicated to showing off the rainbow of colors in the sky?” You’re in control of what you show (and hide) in your final image. With portraits, we naturally want to center our subject in the frame. However, if you offset your subject, you can create interest and better tell a story. Imagine a grid of nine squares over your image, and place your subject at the intersection of those lines. Most cameras have a grid overlay to help with this. For example, instead of having a person stand and face the camera, you could have them look off into the distance at the view and place them in the left or right third of the frame. Fill the rest of the frame with whatever it is they’re observing. This helps create a narrative within your photo instead of simply getting a snapshot.

6. Keep your camera accessible:
This one is important. You can’t always anticipate a shot, so having your camera easily available helps improve your chances of not missing an important event. What’s even more important, especially in the field, is having a system in place to prevent dropping your camera or phone. This can be a neck strap, wrist strap, or even a handheld device attached to the device itself. I have a ring attached to my phone case, which not only allows me to have extra security when taking shots, say over the side of a boat or mid-route while climbing. It also gives me more opportunities to hang my camera from a tree branch and set the self-timer. There are a lot of options out there, just find one that works for you.

7. Go in with no expectations:
Photography is an art. And the advice I give to anyone that is wanting to produce art is to go in with no expectations. Your photos are not supposed to look like anything but what they look like. DO NOT COMPARE yourself or your work with what you see on social media or what your best friend is posting. Instead, just go into it with the intention of capturing the moment, with the hopes of sharing an experience or a pretty view. It’s an outlet for creativity and should be enjoyed not perfected.